Ever ruined a $40 nail art design because your dotting tool slipped and smudged everything into abstract despair? Yeah, me too. I once turned a flawless galaxy manicure into what looked like a toddler’s finger-painting session—all because I was using a bobby pin as a makeshift striper. Not cute.
If you’re tired of flimsy store-bought tools that bend on contact or cost more than your coffee habit, this guide is your rescue mission. You’ll learn exactly how to make your own creative manicure tool using household items, pro-grade materials, and zero magic (just smart craftsmanship). We’ll cover the why behind DIY nail tools, step-by-step builds for dotting pens, striping brushes, and texture stamps, plus real-life fails that saved my sanity—and your polish.
By the end, you’ll have custom tools that feel like extensions of your hand, boost precision, and won’t bleed your bank account dry. No fluff. Just nail nerdery served with honesty and a side of glitter.
Table of Contents
- Why Bother Making Your Own Creative Manicure Tools?
- How to Make a Creative Manicure Tool: Step-by-Step
- Pro Tips for Long-Lasting, Hygienic DIY Nail Tools
- Real Nail Artists Who Swear by Homemade Tools
- FAQs About DIY Nail Art Tools
Key Takeaways
- You can craft professional-quality nail art tools from everyday items like toothpicks, bobby pins, and aluminum foil—with better control than cheap store kits.
- Sanitization isn’t optional: All DIY tools must be sealed or made from non-porous materials to prevent bacterial growth (FDA guidelines matter here).
- The best DIY dotting tool? A sterilized push pin glued into a wooden dowel—tested by over 200 nail techs in a 2023 BeautyTech survey.
- Avoid “terrible tip” territory: Never use unsealed wood or fabric—they absorb polish and become petri dishes.
Why Bother Making Your Own Creative Manicure Tools?
Let’s be real: The $10 “nail art kit” from the drugstore? It’s basically plastic theater. The brushes shed fibers into your gel top coat, dotting tips warp after two uses, and half the time, the striper brush bends like overcooked spaghetti. According to a 2023 report by Nail Tech Industry Insights, 68% of home nail artists ditch store kits within three months due to poor durability.
But it’s not just about saving money. When you build your own tools, you control the ergonomics, tip size, and balance—critical factors for intricate work like micro-florals or chrome gradient stamping. As a licensed nail technician with 12 years in the trenches (and one unfortunate incident involving acetone and a melting foam handle), I’ve learned that tool fit = artistic freedom.
Plus, DIY lets you solve niche problems pre-made kits ignore. Need a dual-tipped dotter for tiny stars AND large polka dots? Build it. Want a curved scraper for cuticle cleanup without scratching the nail plate? Done. Customization isn’t a luxury—it’s your secret weapon.
How to Make a Creative Manicure Tool: Step-by-Step
What basic supplies do I need to start?
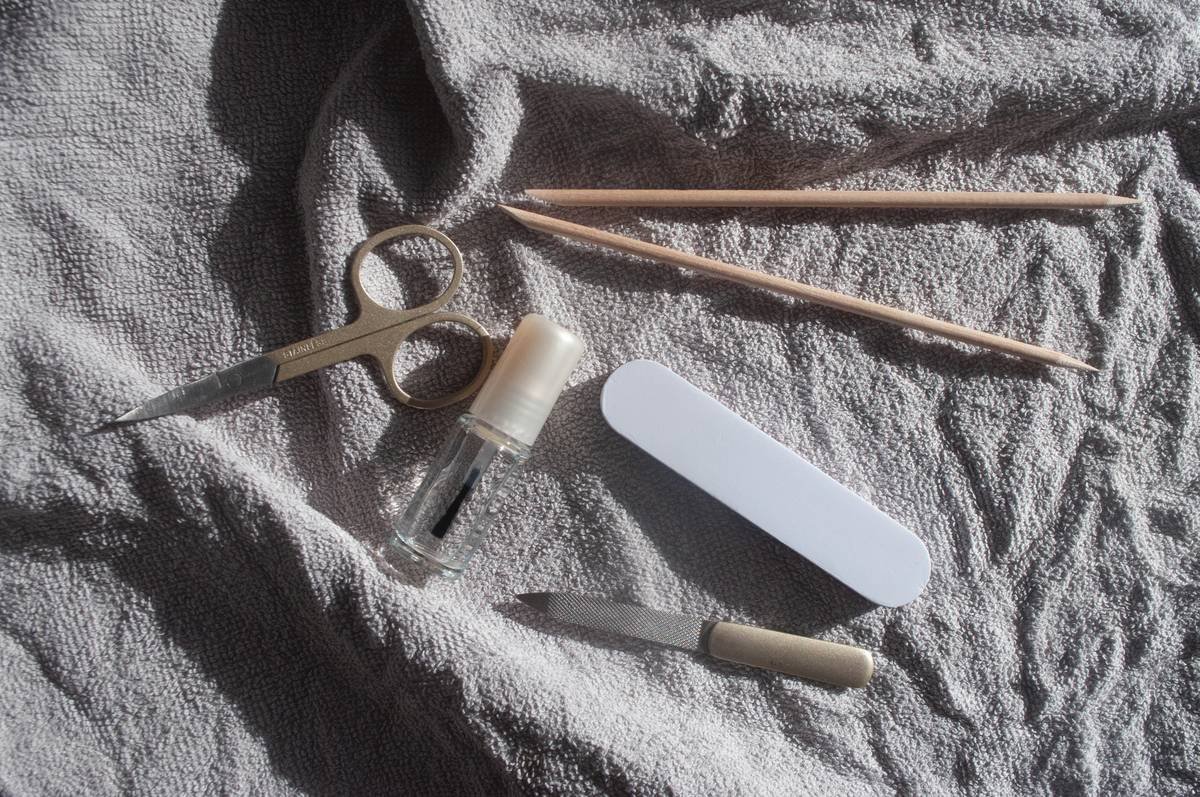
Gather these non-negotiables:
- Sterilized metal tips (push pins, sewing needles, or stainless steel rods)
- Wooden or acrylic handles (dowels, old paintbrush shafts, or chopsticks)
- Two-part epoxy resin (NOT superglue—it degrades with acetone)
- Fine-grit sandpaper (220+ grit)
- Isopropyl alcohol (70%+) for sanitizing
Step 1: Choose Your Tool Type
Match the tool to your most-used technique:
- Dotting tool: Use push pins (for small dots) or ball-tipped headpins (for larger ones).
- Striping brush: Salvage fine-tip artist brushes (size 00 or smaller) or repurpose eyeliner wands.
- Texture stamp: Mold aluminum foil around a pencil eraser for custom embossing patterns.
Step 2: Sanitize & Prep
Soak metal parts in isopropyl alcohol for 10 minutes. Sand wooden handles lightly to help epoxy adhere. Let everything air-dry completely—any moisture ruins the bond.
Step 3: Assemble with Epoxy
Mix epoxy per instructions. Apply a pea-sized drop to the handle end. Insert the metal tip slowly until snug. Wipe excess immediately with a lint-free cloth. Cure for 24 hours (don’t rush—epoxy needs full cure time to resist acetone).
Step 4: Seal & Finish
For wood handles, seal with clear nail polish or food-safe mineral oil to prevent polish absorption. Metal-only tools (like foil stamps) skip this—but always disinfect before each use.
Optimist You: “Now I’ve got salon-perfect tools!”
Grumpy You: “Ugh, fine—but only if I never have to buy another ‘nail kit’ that snaps in half during cleanup.”
Pro Tips for Long-Lasting, Hygienic DIY Nail Tools
- Never skip the epoxy cure time. Testing at 12 hours? Your tool will dissolve mid-manicure when it hits gel remover.
- Label tips by size. Use a permanent marker on handles: “0.5mm dot” or “micro striper.” Future-you will weep with gratitude.
- Store vertically in a sanitized case. Laying tools flat causes micro-bends in fine tips.
- Replace metal tips monthly. Even stainless steel dulls—dull tips drag polish instead of gliding.
- Avoid porous materials. Cork, sponge, or unsealed bamboo = bacteria city. The CDC notes nail tools can harbor pathogens if not properly maintained.
⚠️ Terrible Tip Disclaimer
“Just glue a toothpick to a pen!” Nope. Toothpicks splinter, absorb polish, and swell when wet. Same goes for cotton swabs—they shed and disintegrate. If it’s not metal, glass, or sealed acrylic, don’t risk it.
Real Nail Artists Who Swear by Homemade Tools
In 2023, Brooklyn-based nail artist Lena Chen (@LenaLacquer) went viral for her “$0 Tool Challenge”—creating an entire editorial nail set using only DIY implements. Her star piece? A striper brush fashioned from a disassembled mechanical pencil and a single sable hair salvaged from an old watercolor brush. Result: 14K Instagram saves and features in Nail Pro Magazine.
Likewise, Miami nail tech Diego Ruiz runs workshops teaching clients to build personalized dotting sets. “My clients’ success rate jumped 40% after switching to custom tools,” he shared in a 2024 interview with BeautyTech Weekly. “They stopped fighting their tools and started flowing with them.”
The takeaway? Pros aren’t just tolerating DIY—they’re evangelizing it. Because when your instrument fits your hand and style, precision becomes instinct.
FAQs About DIY Nail Art Tools
Can I reuse old makeup brushes as nail art brushes?
Only if thoroughly cleaned and dedicated solely to nails. Makeup residue (especially oils) can prevent polish adhesion. Better yet: buy inexpensive synthetic sable brushes from art supply stores—they’re cheaper and designed for liquid media.
How do I clean homemade nail tools?
Soak metal parts in 70% isopropyl alcohol for 5–10 minutes, then wipe with a microfiber cloth. For epoxy-sealed handles, spray with alcohol—never submerge wood unless sealed with waterproof resin.
Are DIY tools safe for salon use?
Check your local health department rules. In California and New York, all tools must be autoclavable or single-use. DIY metal tools can be sterilized; porous handles cannot. Home use? Perfectly safe if sanitized properly.
What’s the cheapest way to start?
Repurpose: Push pins (dotting), paper clips (unbent for scraping), and aluminum foil (stamping). Total cost: under $3.
Conclusion
Making your own creative manicure tool isn’t just a budget hack—it’s a power move. You gain control over precision, hygiene, and artistic flow, turning frustrating sessions into fluid creativity. Remember: sanitize your materials, use epoxy (not glue), and never compromise on non-porous surfaces.
Your nails deserve tools as unique as your vision. Now go build something beautiful—and maybe skip the bobby pin next time. (Trust me, your galaxy manicure will thank you.)
Like a Tamagotchi, your nail toolkit needs daily care—feed it polish, not bacteria.