Ever spent hours scrolling through Instagram for nail art inspiration only to realize you don’t even own the right tools? Yeah, we’ve been there too. If you’re dreaming of adding jaw-dropping designs to your nails but aren’t sure where to start with nail art flakes, this guide is here to save your manicure game.
In this post, we’ll dive deep into what makes nail art flakes a must-have in your toolkit (spoiler: they’re not just pretty—they’re versatile AF). You’ll learn how to choose the best tools, apply them like a pro, and avoid rookie mistakes that could ruin your vibe. Plus, we’ll throw in some brutally honest takes on common pitfalls and a sprinkle of nostalgia because… why not?
Table of Contents
- Key Takeaways
- What Are Nail Art Flakes and Why Do They Matter?
- Step-by-Step Guide: Essential Tools for Using Nail Art Flakes
- Tips & Tricks for Mastering Nail Art Flake Designs
- Real-Life Examples of Stunning Nail Art Flake Creations
- Frequently Asked Questions About Nail Art Flakes
Key Takeaways
- Nail art flakes add dimension and texture to any mani-pedi routine.
- The right tools—from tweezers to gel topcoats—are essential for flawless application.
- Avoid rushing the process; patience = perfection when working with delicate flakes.
- Experimentation leads to creativity—don’t be afraid to try new techniques!
What Are Nail Art Flakes and Why Do They Matter?
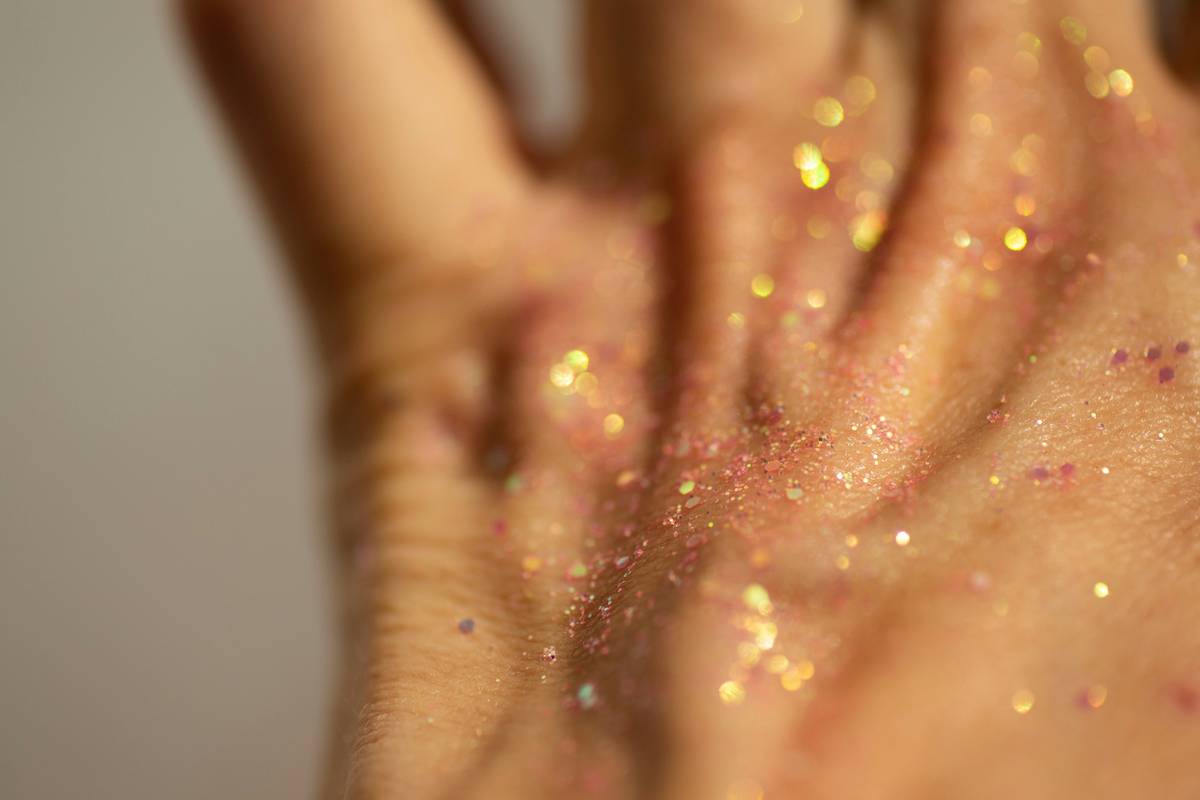
Nail art flakes are tiny decorative fragments made from materials like foil or metallic sheets. They come in various shapes, sizes, and finishes, ranging from holographic glitters to matte pastels. These bad boys can transform an ordinary manicure into something Insta-worthy faster than you can say “OOTD.”
Why should you care? Because they’re insanely easy to use once you know the ropes—and who doesn’t love looking like they just walked out of a high-end salon without breaking the bank? From subtle accents to bold statements, nail art flakes offer endless possibilities for customizing your look.
Step-by-Step Guide: Essential Tools for Using Nail Art Flakes
If you think all you need is a bottle of polish and hope, think again. Here’s how to set yourself up for success:
Step 1: Gather Your Supplies
- Tweezers: Precision is key, so invest in a fine-tip pair.
- Base Coat: Prep your nails properly before applying anything else.
- Top Coat: Seal the deal with a glossy finish (gel works wonders).
- Picker Tool: This little gadget helps place flakes exactly where you want them.
Step 2: Prep Your Nails
“Optimist You: ‘Let’s jump straight into the fun part!’
Grumpy You: ‘Not so fast—clean those cuticles first, okay?'”
Start by shaping your nails and cleaning off any oils or residue. A clean canvas ensures better adhesion and longer-lasting results.
Tips & Tricks for Mastering Nail Art Flake Designs
- Layer Strategically: Apply flakes one by one over wet polish for a seamless blend.
- Mix Textures: Combine different types of flakes for a multi-dimensional effect.
- Less Is More: A few strategically placed flakes go a long way.
Terrible Tip Alert: Don’t just toss flakes onto dry nails and hope for the best. That’s basically asking for disaster unless you’re aiming for accidental abstract art (and hey, no judgment if you are).
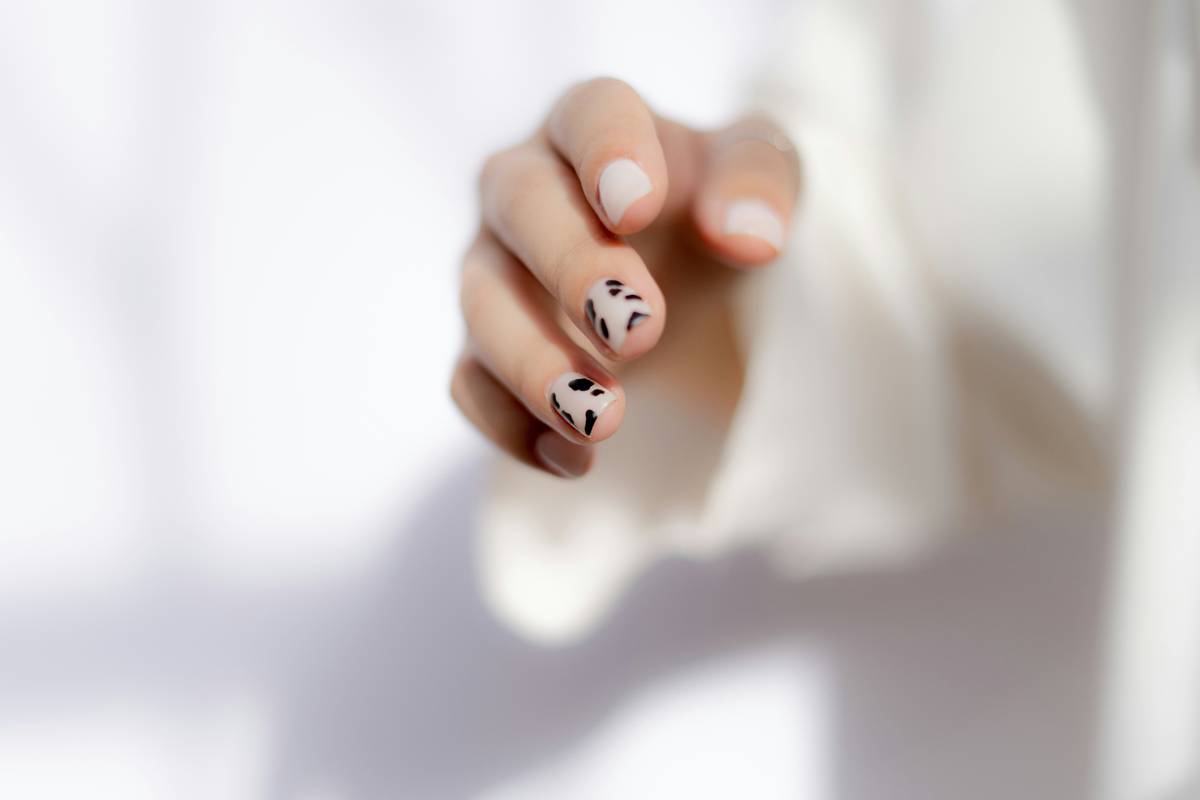
Real-Life Examples of Stunning Nail Art Flake Creations
Check out these killer examples from pros:
- Metallic Marble: Subtle hints of gold flake layered under smoky gray polish create a luxe marbled effect.
- Holographic Accents: Tiny rainbow flakes scattered across nude nails scream modern elegance.
Frequently Asked Questions About Nail Art Flakes
Where Can I Buy Quality Nail Art Flakes?
Amazon, Etsy, and specialty beauty stores are great places to find affordable yet high-quality options.
Do I Need Special Training to Use Them?
Nope! While practice helps, anyone can master the basics with the right tools and guidance.
Can I Remove Flakes Easily?
Yes, simply soak your nails in acetone-free remover or gently peel them off using oil-based cleanser.
Conclusion
Congrats—you’re now equipped to slay the nail art flake game. Remember, it’s all about having fun, experimenting, and finding your unique style. And if things get messy along the way, well, that’s half the charm.
To recap:
– Invest in quality tools.
– Prep and layer carefully.
– Embrace experimentation.
Now go ahead and dazzle the world with your newfound skills—and remember, *never underestimate the power of glitter.* 😉
Like a Tamagotchi, your nails need daily TLC…and maybe occasional sparkle.

